


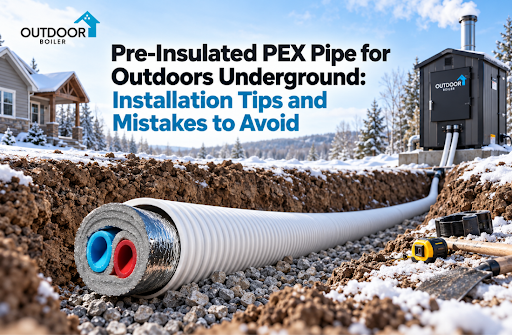
Pre-Insulated PEX Pipe for Outdoors Underground: Installation Tips and Mistakes to Avoid
If you are planning an outdoor underground water or heating line, pre-insulated PEX pipe can be a practical choice when it is installed correctly. I will walk you through the preparation, installation steps, and mistakes I would avoid so your buried piping can perform reliably for years.
Why installation details matter
Pre-insulated PEX pipe has a flexible PEX carrier pipe surrounded by insulation and an outer protective jacket. The insulation helps reduce heat loss in hot water and hydronic heating applications, while the jacket helps protect the assembly from soil and moisture. That protection is useful, but it does not make the pipe immune to poor trench work, sharp objects, freezing conditions, or incorrect connections.
Before buying materials, identify exactly what the line will carry. Domestic water, radiant heating water, and outdoor boiler circuits can have different temperature, pressure, and fitting requirements. Confirm that the pipe, insulation, jacket, and fittings are approved for the intended service. Local plumbing codes may also specify burial depth, approved materials, warning tape, sleeving, and testing procedures.
Plan the route before digging
Prepare a stable trench
The trench should be wide enough for safe installation and deep enough to meet local requirements for the climate and application. Do not rely on one universal depth. Frost conditions, traffic loads, pipe type, and local regulations all affect the correct amount of cover.
Remove rocks, broken concrete, glass, roots, and other sharp objects from the trench. Place a smooth bedding layer of sand or fine soil under the pipe if the native soil is rough. The goal is continuous support without pressure points. After positioning the pipe, use similarly clean material for the first layer of backfill. Compact it carefully by hand around the jacket before adding larger amounts of soil.
Avoid leaving empty spaces beneath the pipe. Unsupported sections can settle later and place stress on transitions at the building entrances. If the route crosses a location that could settle, use suitable bedding and follow the pipe manufacturer’s recommendations for support.
Handle the pipe carefully
PEX is flexible, but flexibility should not be confused with unlimited bendability. Follow the manufacturer’s minimum bend radius and use approved bend supports where needed. Never kink the pipe to save a few inches of trench space. A kinked section should be replaced rather than pulled straight and buried.
Keep the pipe capped while it is being moved and installed. This prevents dirt, water, and insects from entering the carrier pipe. Do not drag the assembly across sharp ground or pull it around corners with excessive force. Inspect the outer jacket before backfilling. A damaged jacket can allow moisture into the insulation and reduce its performance.
The Plastics Pipe Institute recommends clean, square cuts made with a PEX tubing cutter intended for the product. This simple step matters because a rough or angled cut can interfere with a fitting and increase the chance of leakage.
Protect building entry points
The transition from the trench into a building deserves special attention. Use a sleeve or other approved protection where the pipe passes through masonry, concrete, or a foundation wall. Seal the opening as required to limit water, air, insects, and unwanted movement, but do not crush the pipe or its insulation.
Support the pipe near the entry and avoid placing stress on the first indoor fitting. If the pipe must change direction sharply, make that change with an approved bend support or fitting. For lines carrying hot water, plan for thermal movement and use components rated for the operating temperature.
Connect and pressure test before backfilling
Use only fittings and connection tools that are compatible with the exact PEX type and size. Mixing systems based only on appearance can lead to an unreliable joint. Keep connections accessible until the system has been inspected and tested.
Pressure test the completed line before closing the trench. Follow the pipe and fitting manufacturer’s test method, and check local code requirements. Look closely at every joint, transition, valve, and indoor connection. Testing first is far easier than finding a leak after the trench is full.
Once the test is successful, record the route with measurements and photographs. Keep those records with your property documents. They can save time if you need to dig in the future.
Common mistakes to avoid
The most frequent problems come from rushing the parts that are not visible later. I would avoid these mistakes:
- Digging without checking local requirements or locating utilities.
- Using a shallow trench without considering frost or surface loading.
- Placing the pipe directly on rocks or construction debris.
- Kinking the PEX or exceeding its minimum bend radius.
- Burying an untested connection.
- Cutting the pipe with a saw, knife, or unsuitable tool.
- Damaging the protective jacket during handling.
- Leaving the pipe ends open during construction.
- Forgetting to document the completed route.
Final thoughts
A successful underground PEX installation is mostly about preparation. Select a compatible system, plan a sensible route, create a smooth and stable trench, protect the pipe while handling it, and test every connection before backfilling. For code details, consult your local authority and the product manufacturer. The International Code Council’s water service guidance is also a useful reference for underground outdoor water service requirements.
If you would like more practical guides for plumbing, heating, and outdoor water projects, visit outdoorboiler.com for additional installation information and helpful project resources.
